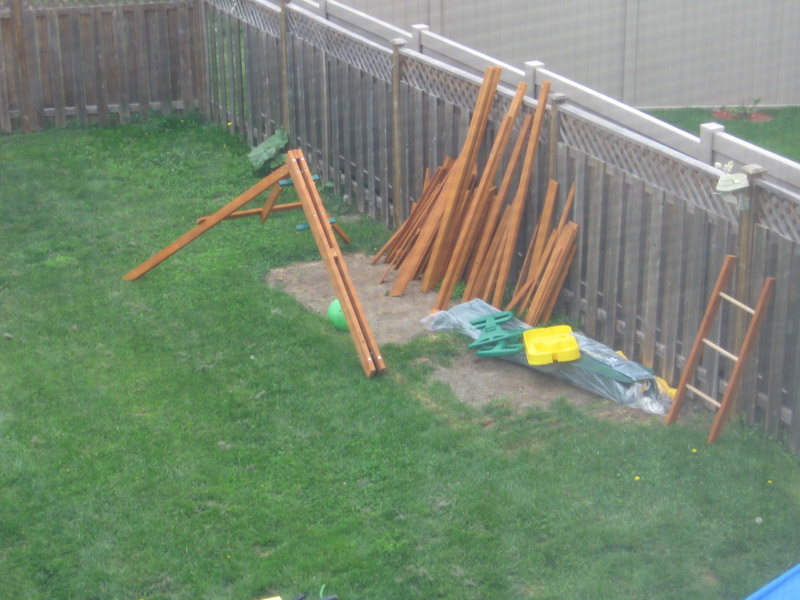
This weekend I put together the playhouse we got with the help of Hayden and Melodie’s grandparents!
After 3 days and a little sunburn it’s done.
And they like it 🙂

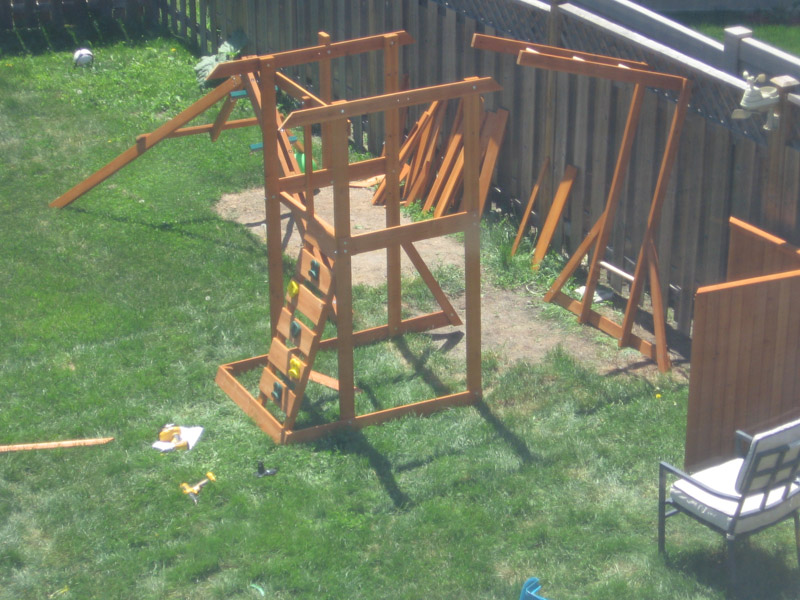

This weekend I put together the playhouse we got with the help of Hayden and Melodie’s grandparents!
After 3 days and a little sunburn it’s done.
And they like it 🙂
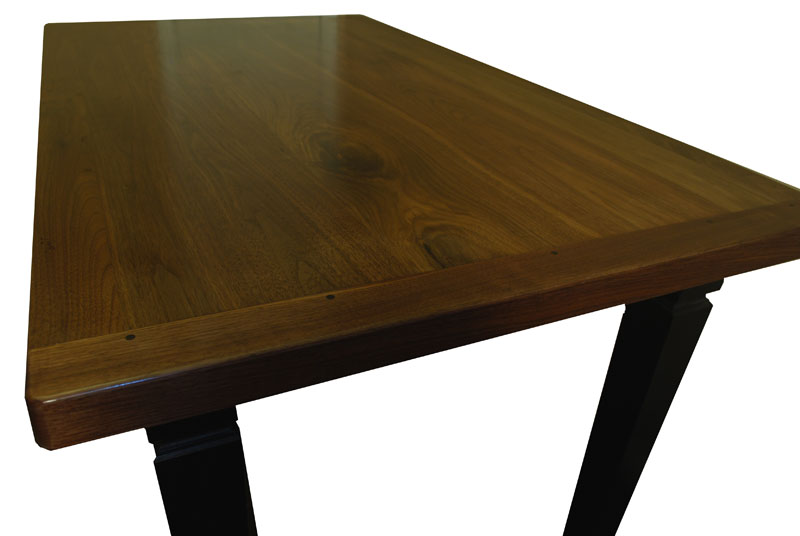
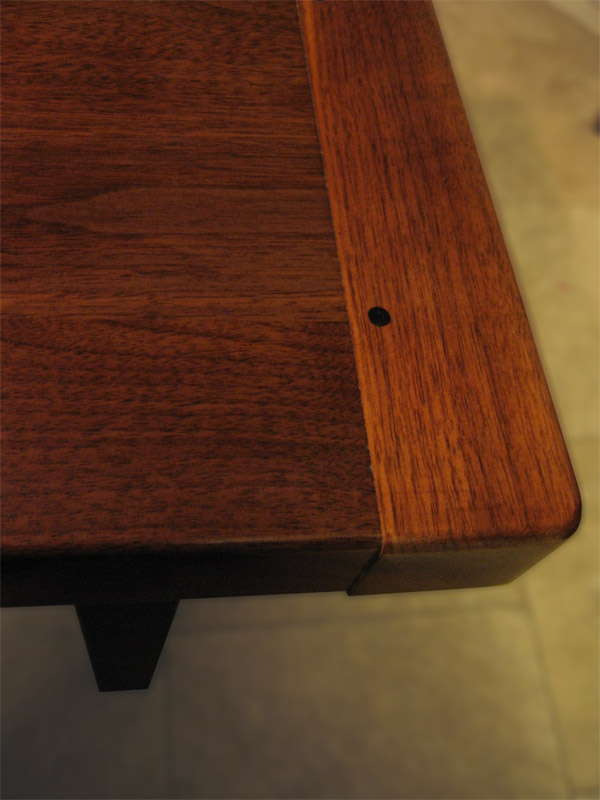
Here’s a photo now in February of how much my walnut kitchen table has shrunk within the floating breadboard ends. Good thing they’re able to move around or the ends would have cracked the joint.
I expect in the summer they will either come back or even expand past the end caps.
I finished two shop mallets for chisels, joinery and for using workbench holdfasts, one large and one smaller.
Material used was maple with walnut accents. The mortise in the head is angled to match the tapered handle so it can slip out backwards but will tighten when swung.

Today I turned this wooden mallet for chisels and carving made of a solid maple blank.
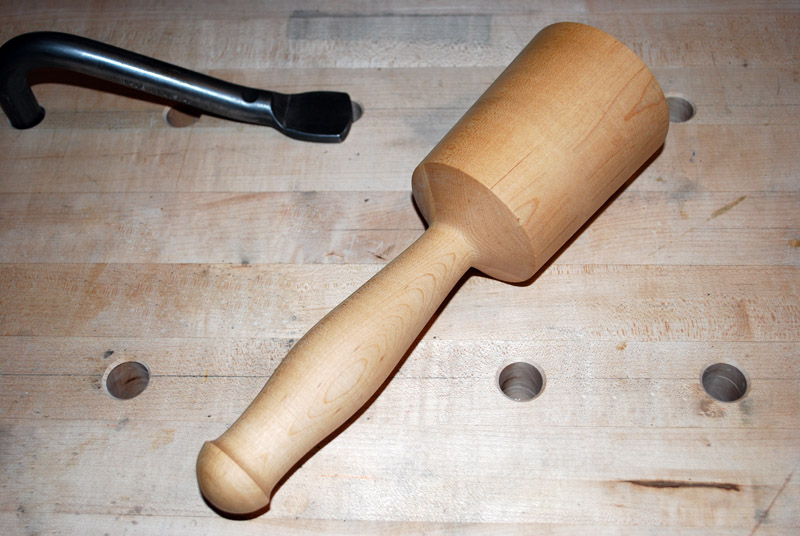
I made these as gifts this Christmas, one to my wife.
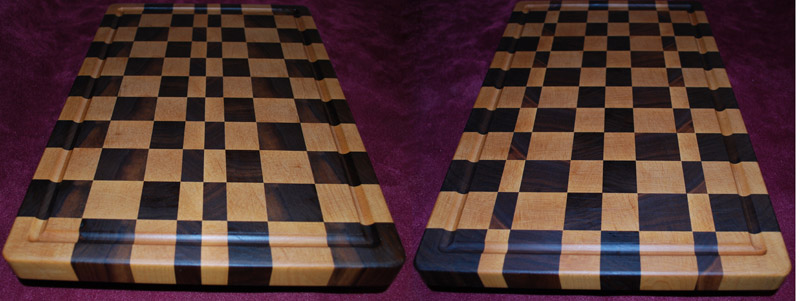
Maple/walnut end grain, finished with mineral oil and beeswax.
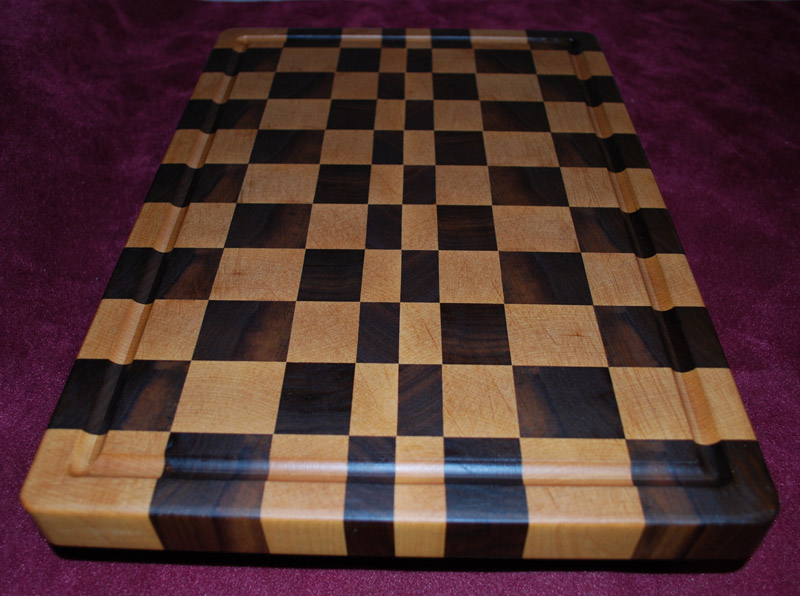
I had this done for a customer who wanted a case for her collection of shot glasses. Each cell had to be 4″w x 4d” but the height was designed to have variable heights based on a sketch up. It’s actually 5 feet long.
The 1″ thick case sides were made of maple, the inside was 1/2″ thick plywood with maple edge banding. Back panel was 1/4″ birch plywood.
I have to say I underestimated the work involved with this one. One small error in any dimension through each cell off exponentially and it’s easy to see these lines stray off square.
I had to redo it a couple times before I found a solid work flow.
I took it as a learning experience.
She wanted two!

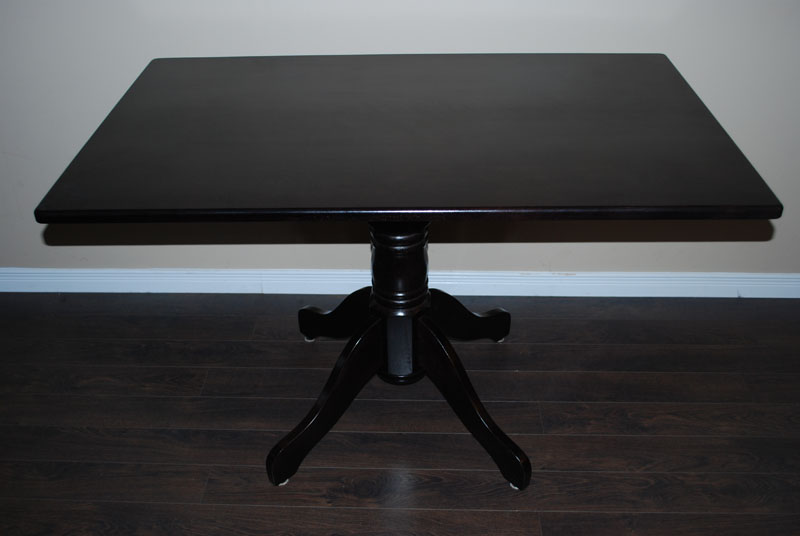
I just finished doing a simple table for a customer, maple top with espresso finish, the base was also sanded and finished as well.
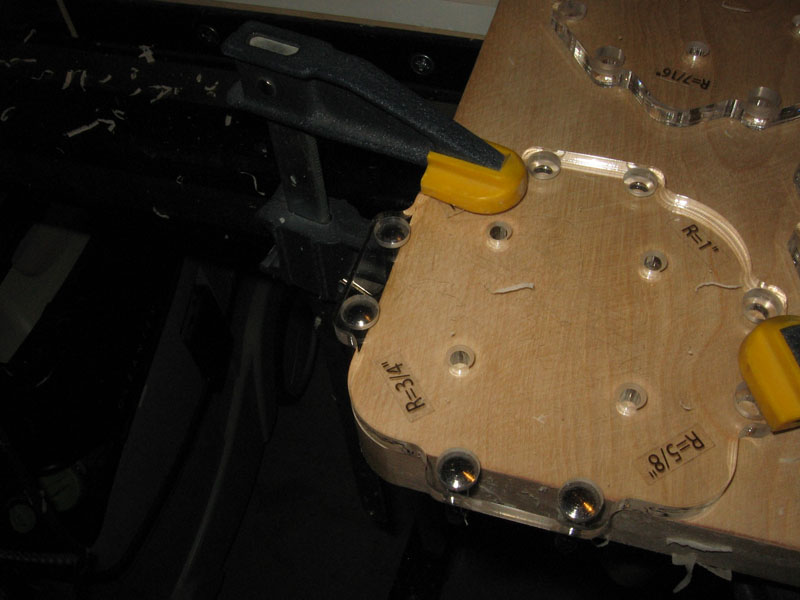
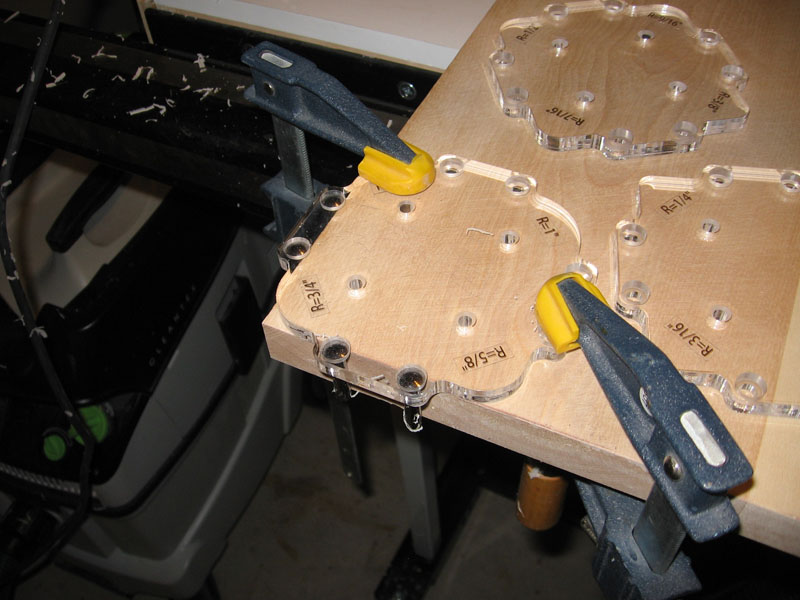
I picked this template set to round off corners after seeing it on sale. They come in 12 different radii, 1/8″ increments, from 1/8″ to 1″. Very nice! Up until now I’ve been using the oscillating spindle sander but that’s kind of hard with a large table top.
It had 4 pins to hold it at the corner so the lead in and lead out is flush to the edge.
An early Christmas present, the Excalibur Blade guard/ dust extraction by General Tools.
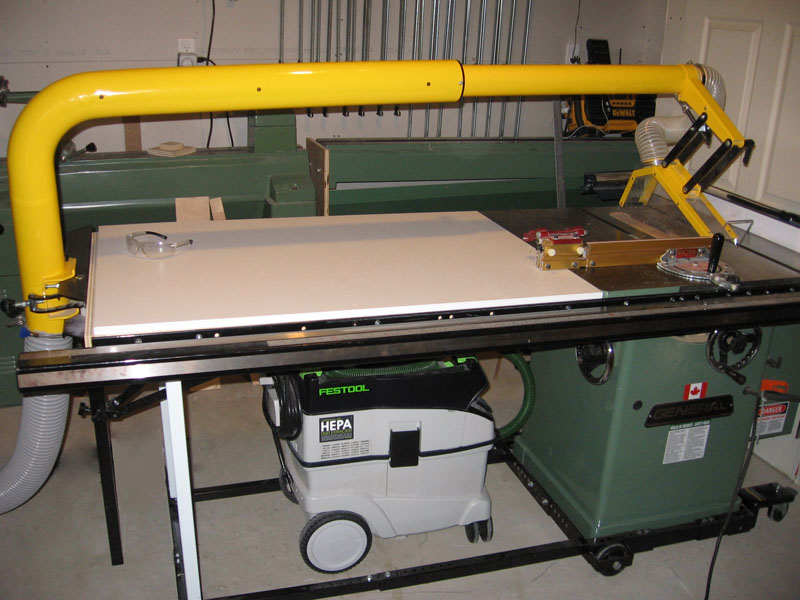
I installed this on my table saw yesterday and it works much better than I thought it would. There’s almost no dust when I’m cutting, the dust that does seem to escape is the larger particles that aren’t as harmful to my lungs. Here’s a shot of me making a few cuts without the guard or dust extraction turned on. You can’t see it but most of the dust is thrown towards me, behind me and mostly on the floor.
Here’s a shot with the guard over the blade and the dust collector turned on, it actually just pivots out of the way if you don’t need it.
There was no dust on me or on the floor that I could see. This is a huge improvement for the basement shot where dust is an important concern long term. I really should have gotten that years ago. Very recommended.
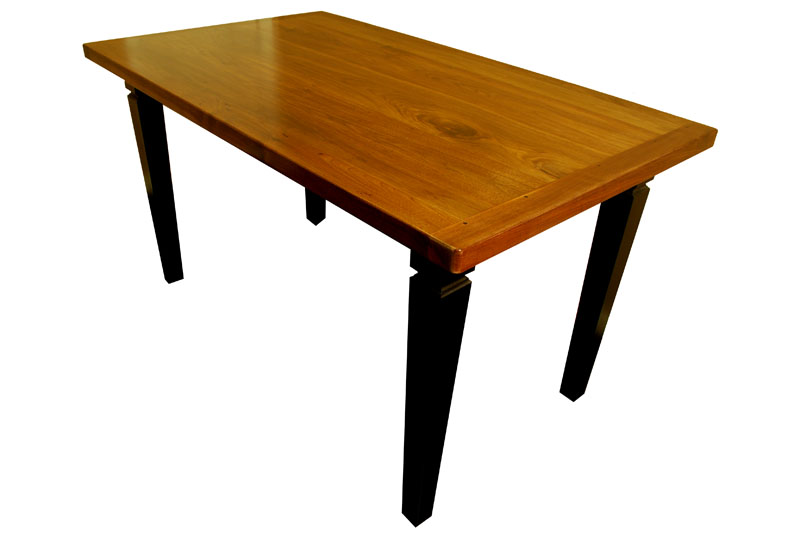
The table is done.
8/4″ thick walnut top, maple legs and apron.
Breadboard table top ends, floating mortise and tenon, glued at the center, remainder waxed and pinned with elongated slots to allow for expansion. Pins plugged with ebony.
Finish:
Top: – Tung oil, shellac sanding sealer, CrystaLac pore filler, General Finishes high performance polyurethane.
Legs – Black ebony aniline dye mixed with polyurethane, then several clear coats of poly.