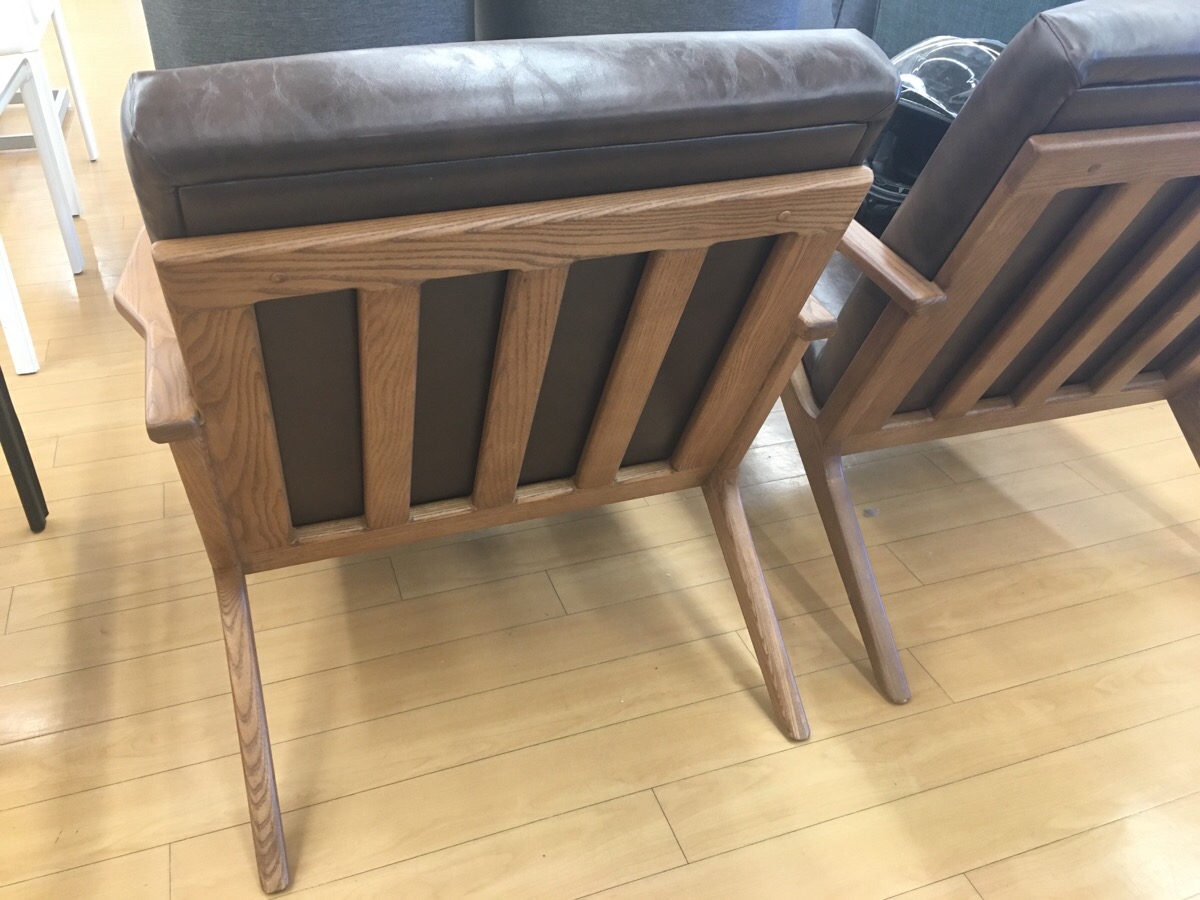
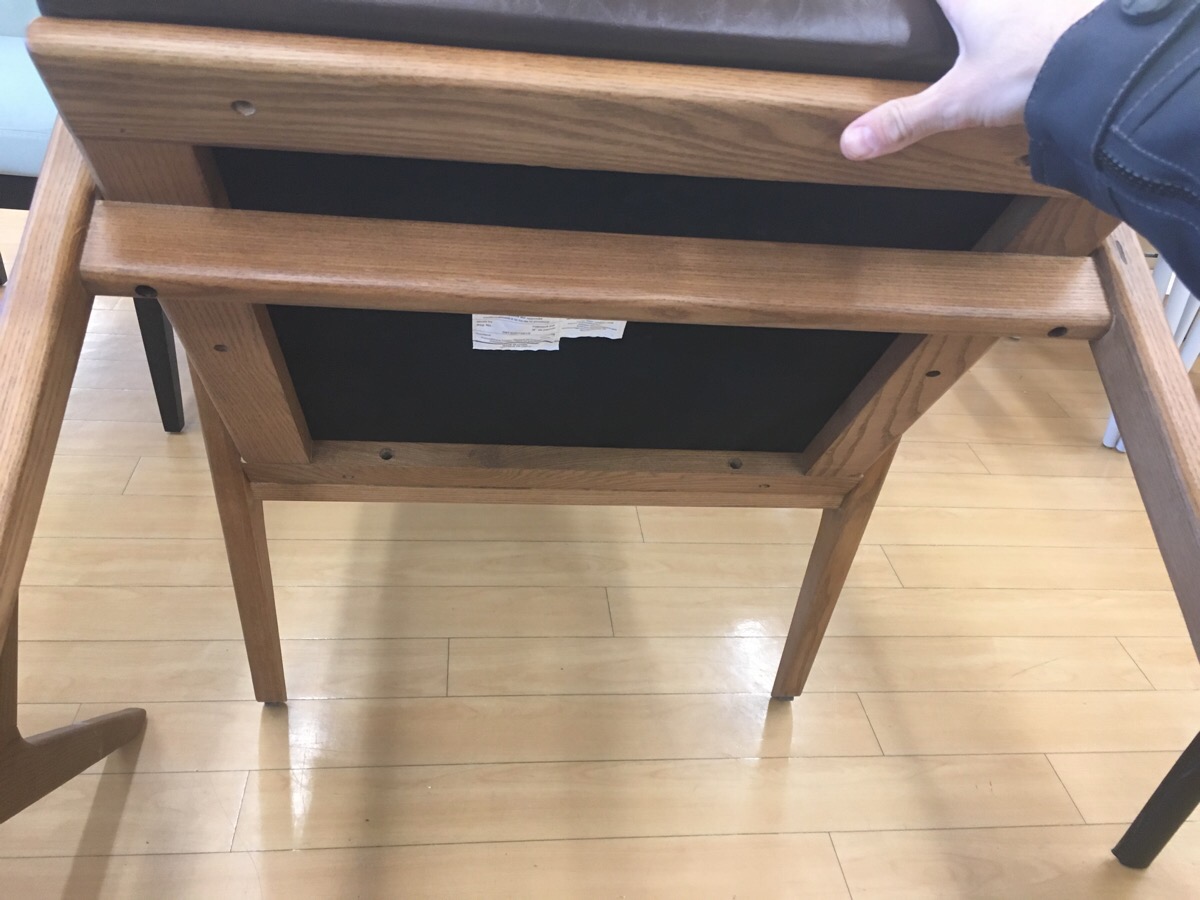
I saw this “Peter Accent Chair” in a store and decided I’ll make a pair. I’ll try my hand at upholstery. It has a bit of shaping going on at the joints.
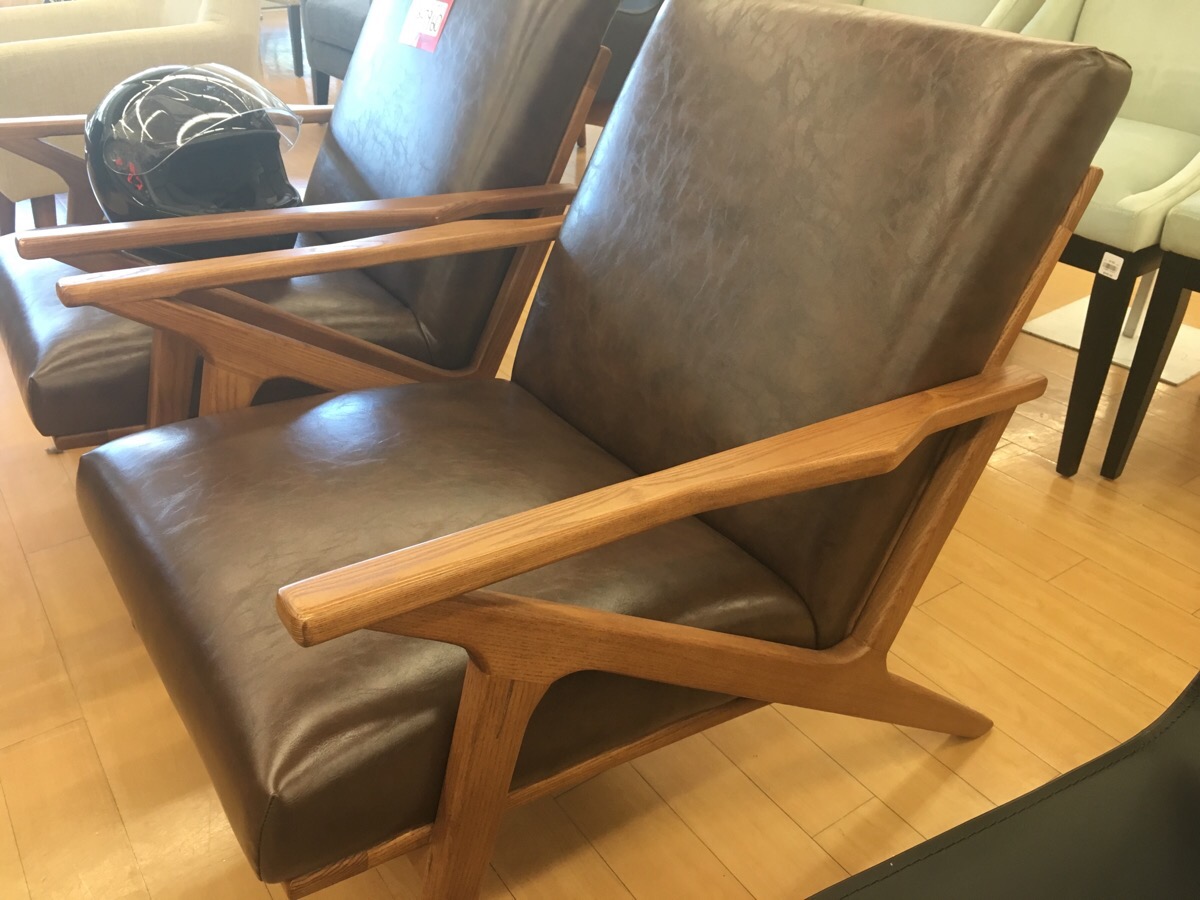
I saw this “Peter Accent Chair” in a store and decided I’ll make a pair. I’ll try my hand at upholstery. It has a bit of shaping going on at the joints.
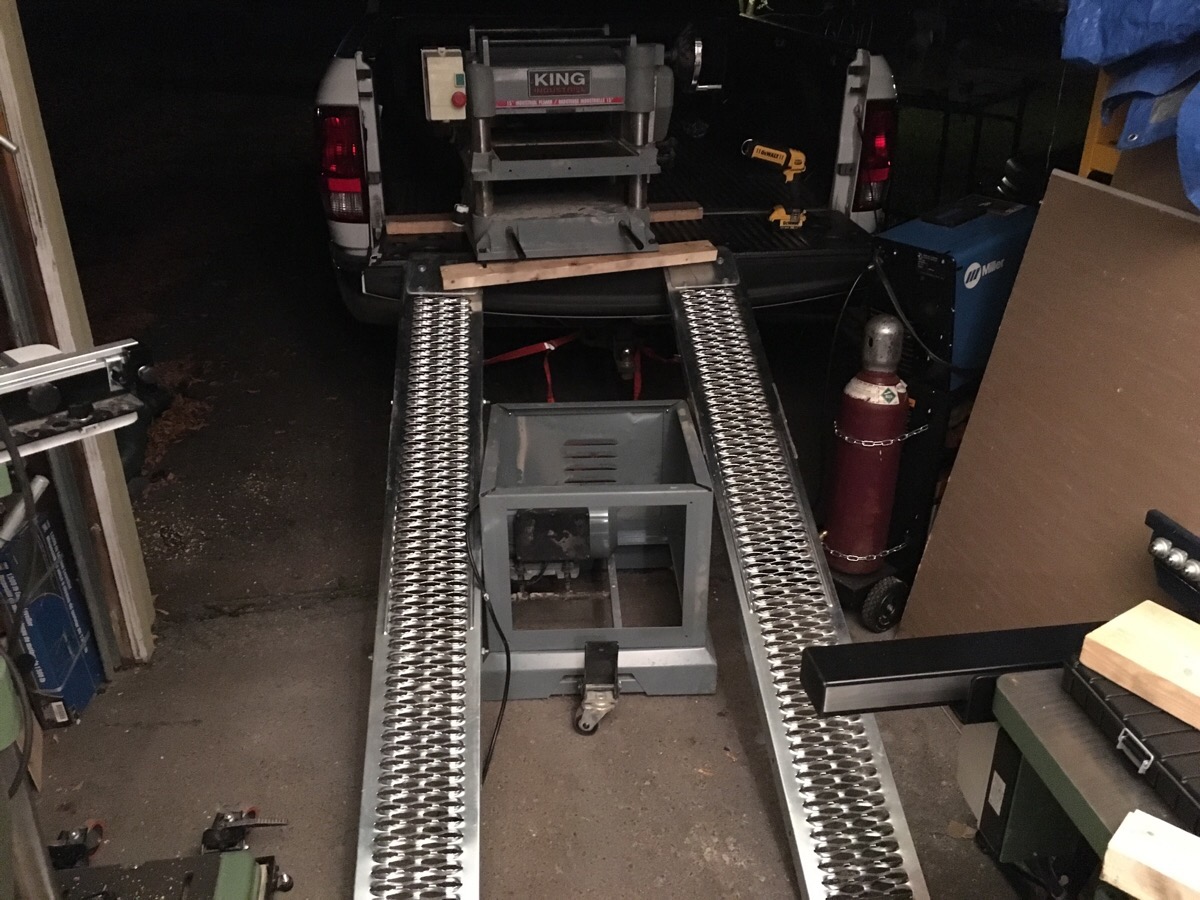
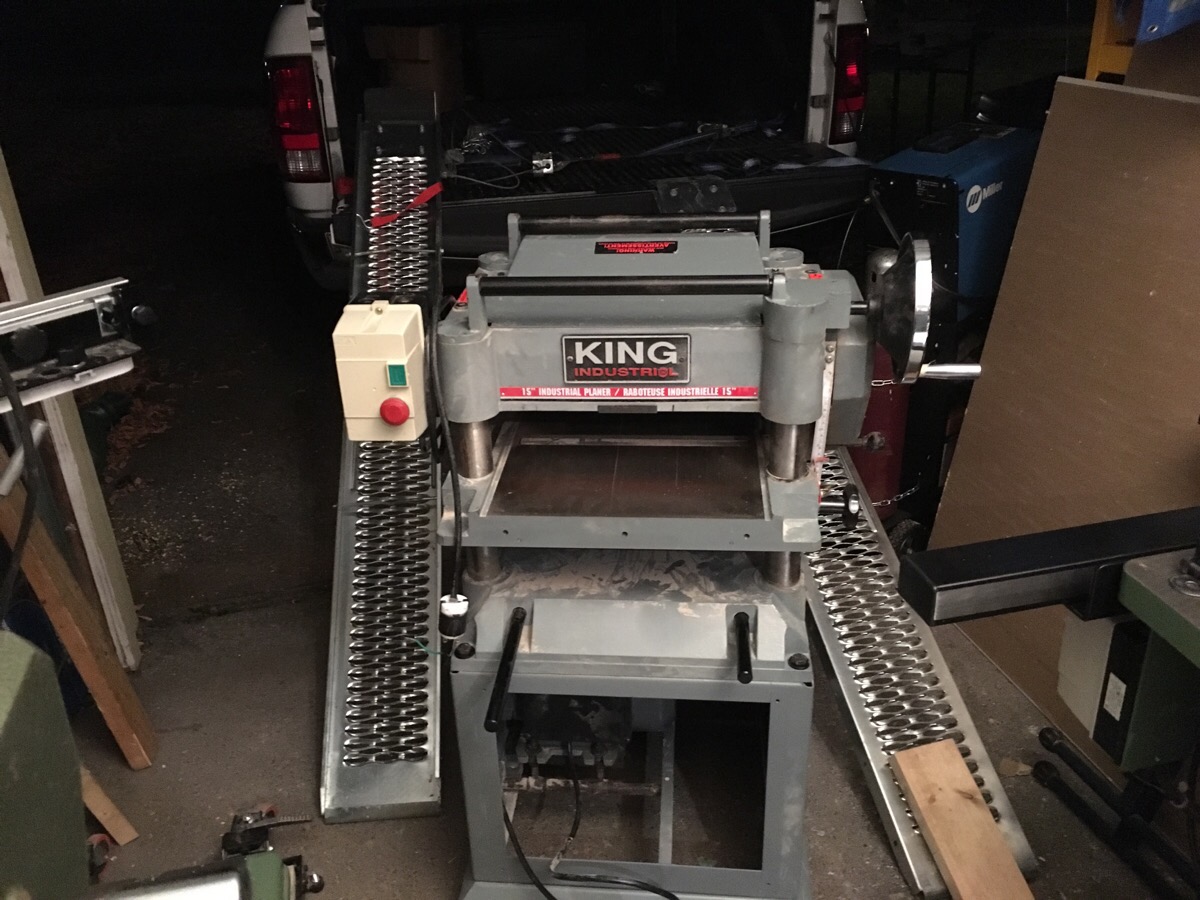
I got a deal on a used King Indistrial 15″ Planer to replace the older model I have (free upgrade) so I took the truck to pick it up.
I also picked up these 6′ truck ramps, I don’t know why I haven’t thought of them before it would have saved me money on U-Haul trailer rentals. I can dolly things up and down if they’re light enough. This time though the planer was too heavy so I had to slide it down the ramps.
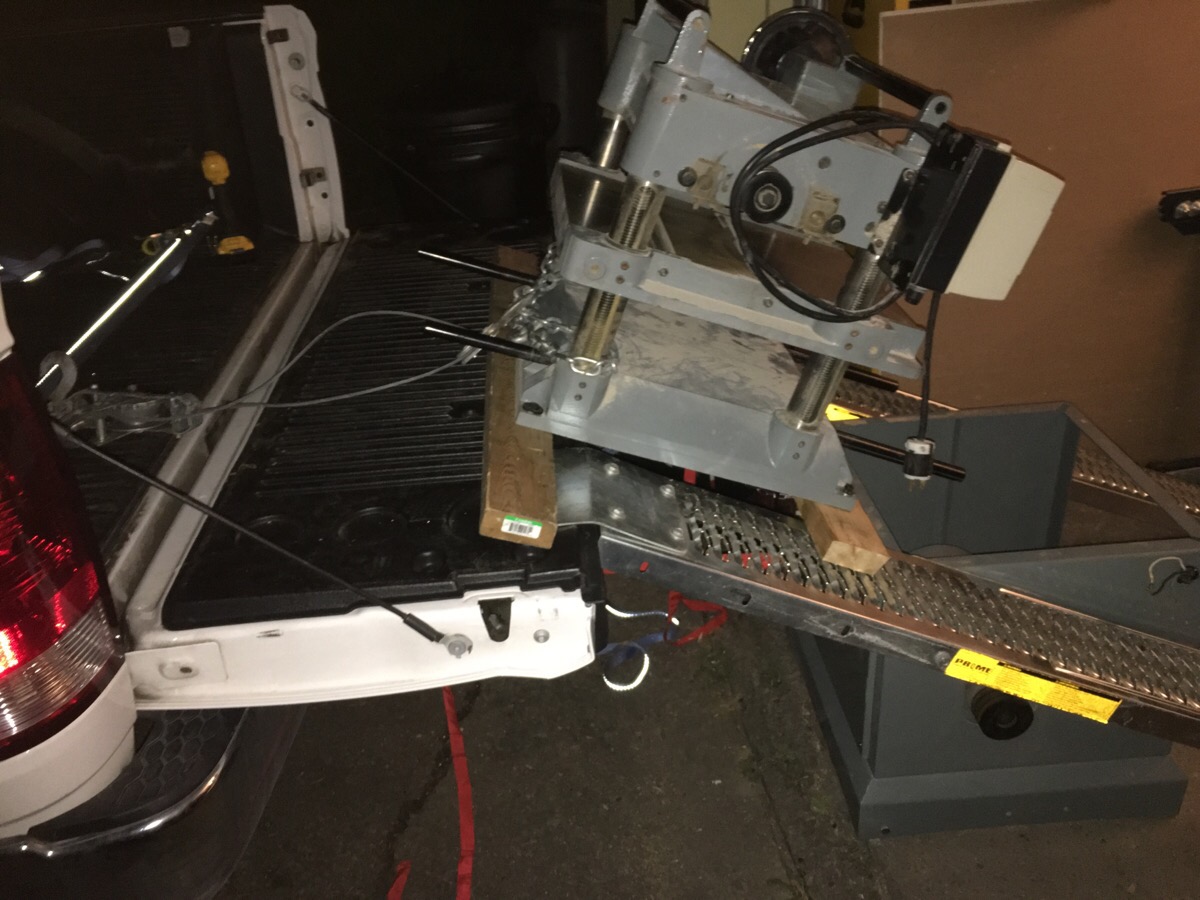
My plan was to put the planer stand between the ramps so half way down the heavy top portion would just slide onto it and save me from liftin it up onto the stand.
It worked great.
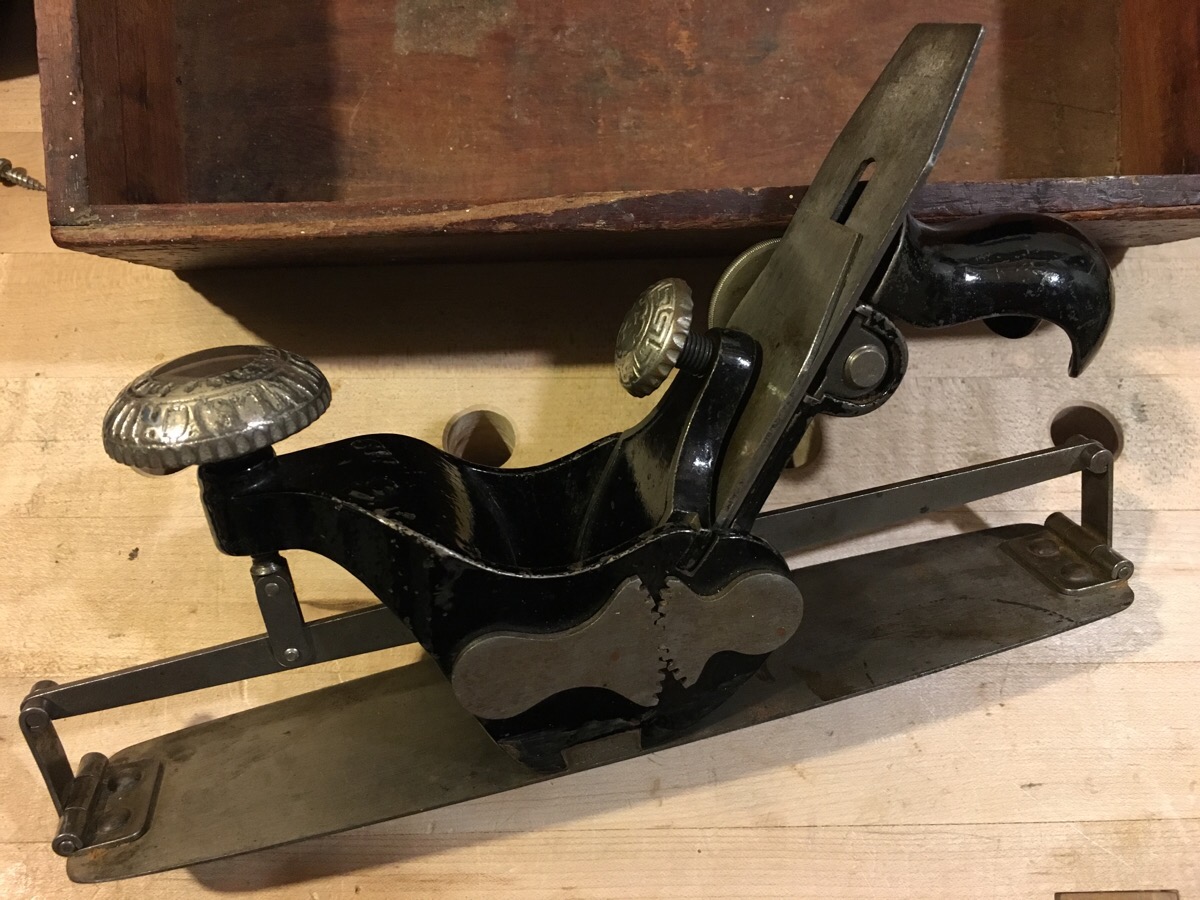
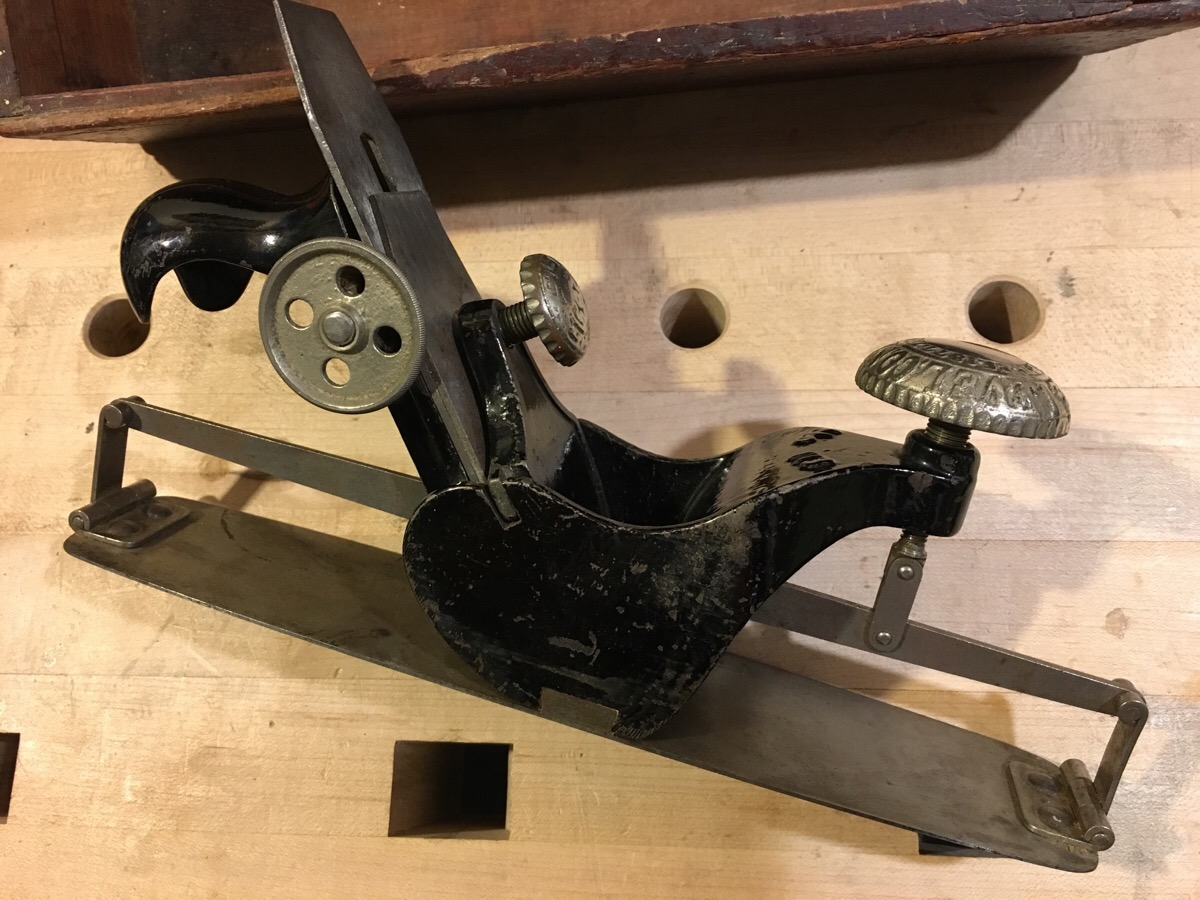
This is the best looking Stanley #113 compass plane I’ve seen. This particular one is a type #2 from 1880-1891 and it moves like butter. Nothing stiff or corroded like it was out of the box.
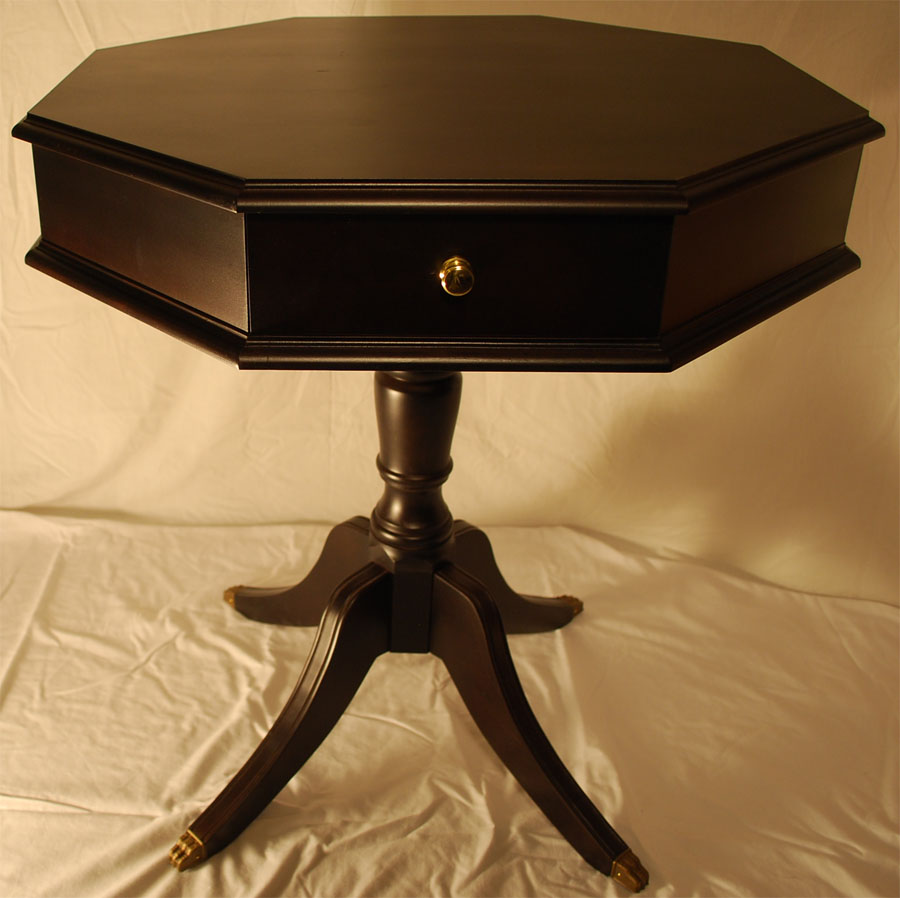
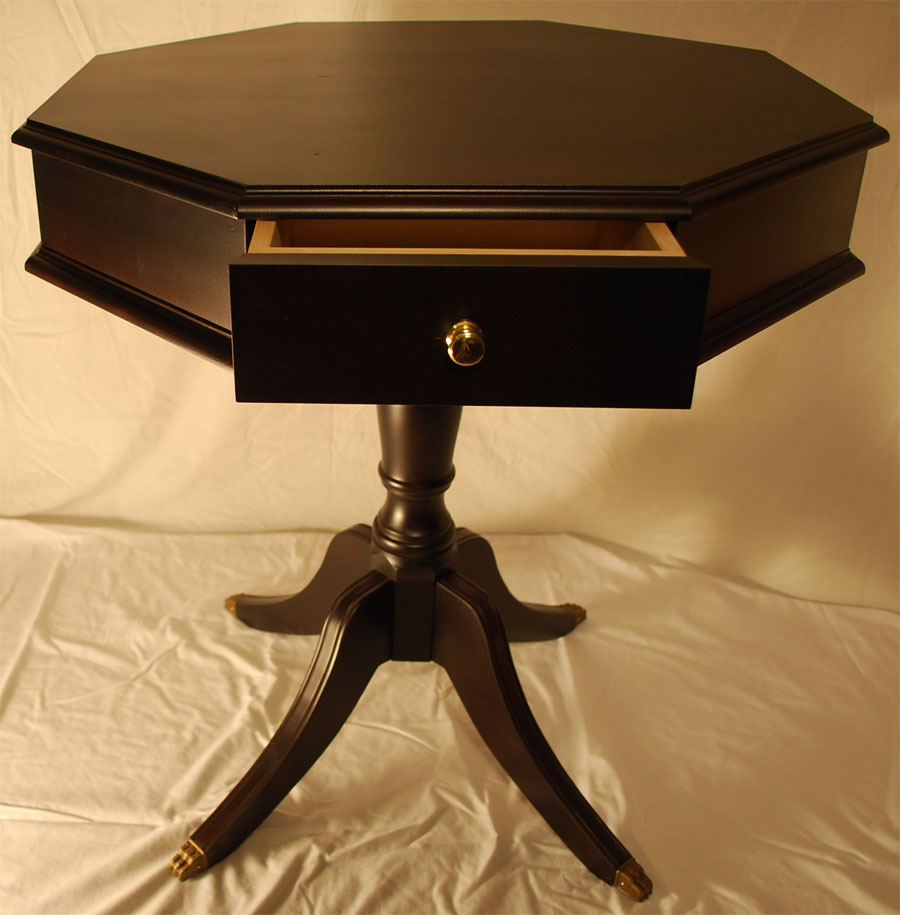
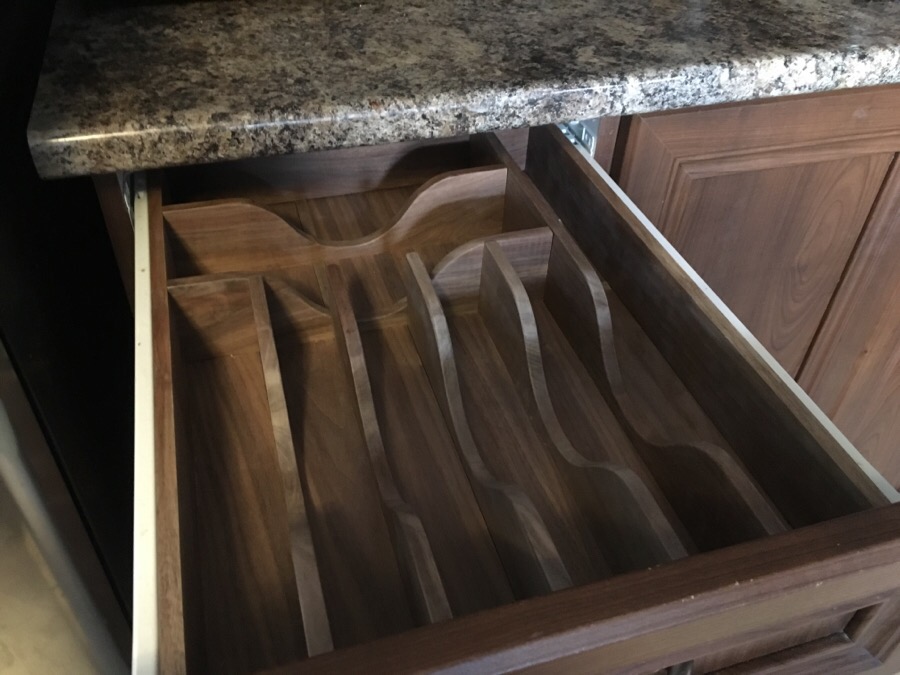
This took me longer than I thought but I made this drawer organizer out of walnut to set inside the kitchen drawer.
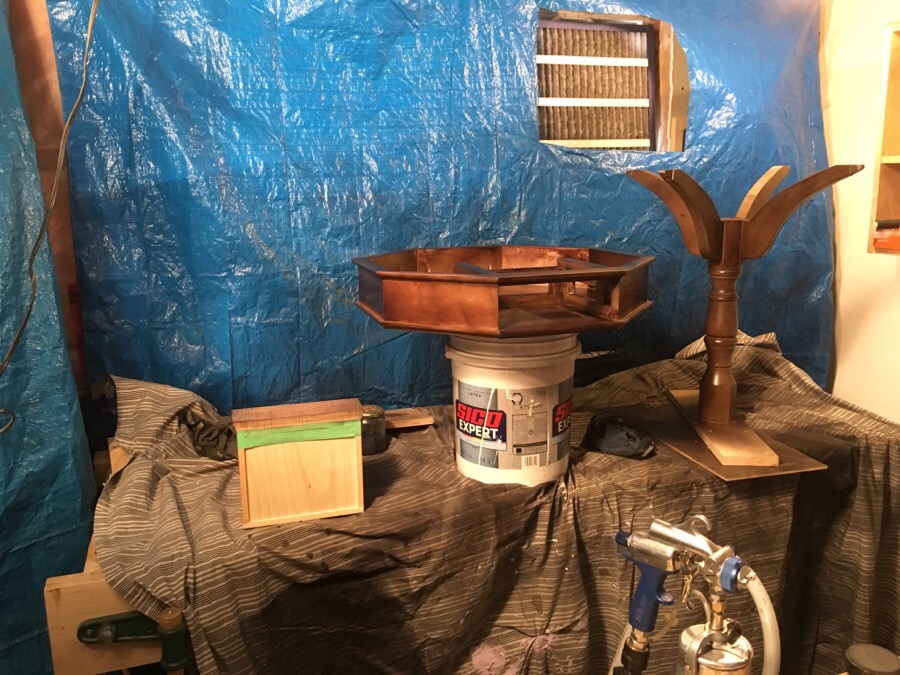
I’m okay with that I think, need to put a gloss coat now.
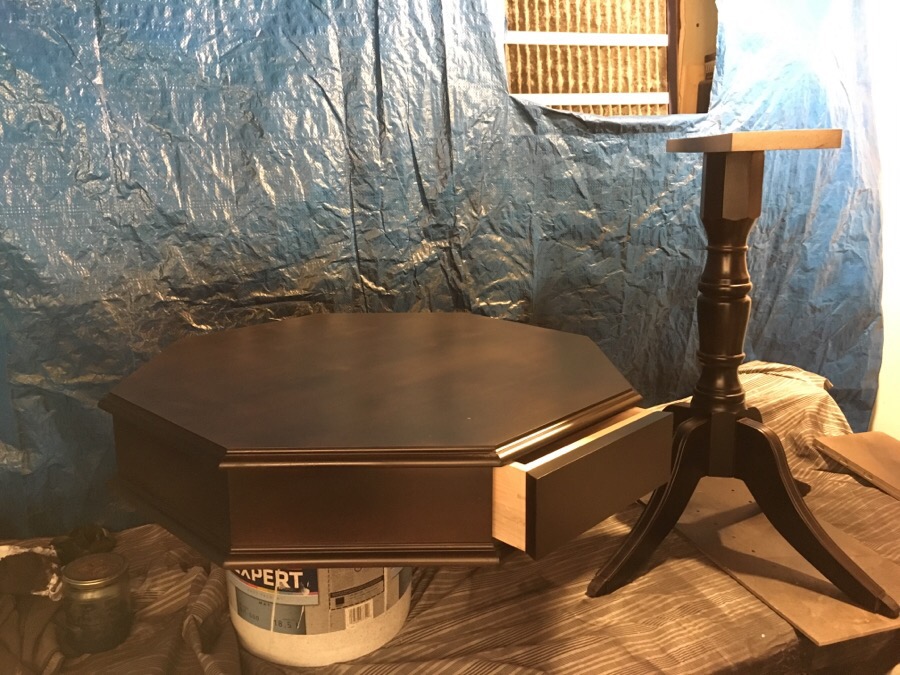
1st coat of making something maple look like something brown.
In my Fuji spray gun I mixed precisely a bunch or walnut brown and a bunch of mahogany aniline dye powder in a bunch of clear water based polyurethane. Shook it up, sprayed a bit.
Like my spray booth? Tarps everywhere with a box fan covered with a furnace filter to blow the fumes outside. Mind you, there wasn’t a lot of fumes since I was using water based poly.
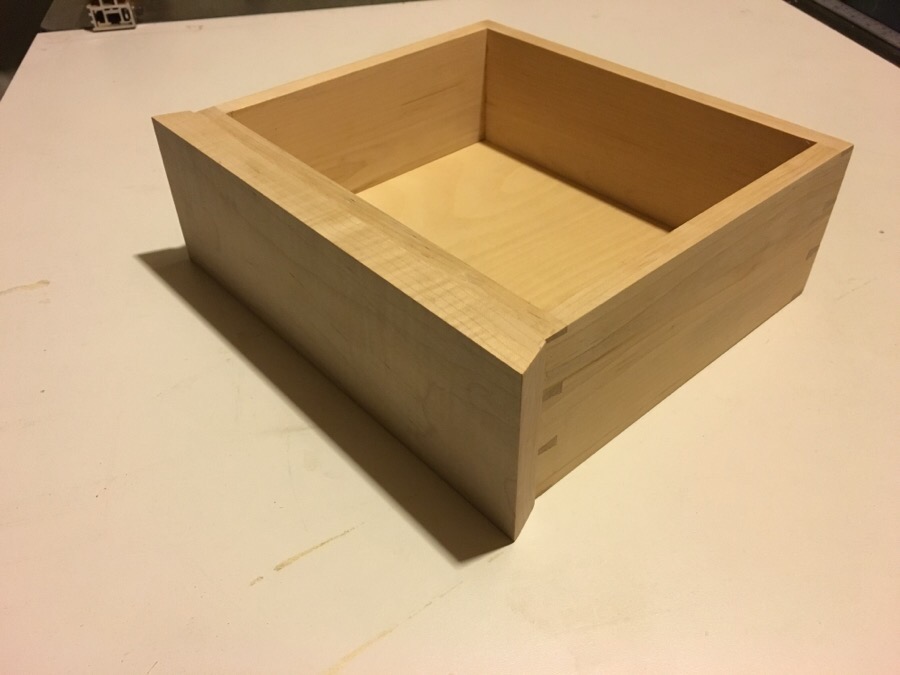
I decided it would be a great idea to try my first hand cut dovetails on an important project :). No time for screw ups or do-overs here. One shot.
But first a change of plans. I was going to leave the drawer front to include the bottom molding in a single unit that would slide in to fit the opening and top but I decided to make the bottom molding a fixed stile and the flat drawer face slides in the middle between the top and bottom moldings. It seems more typical that way. Retro fitting the bottom stile as an afterthought was tricky.
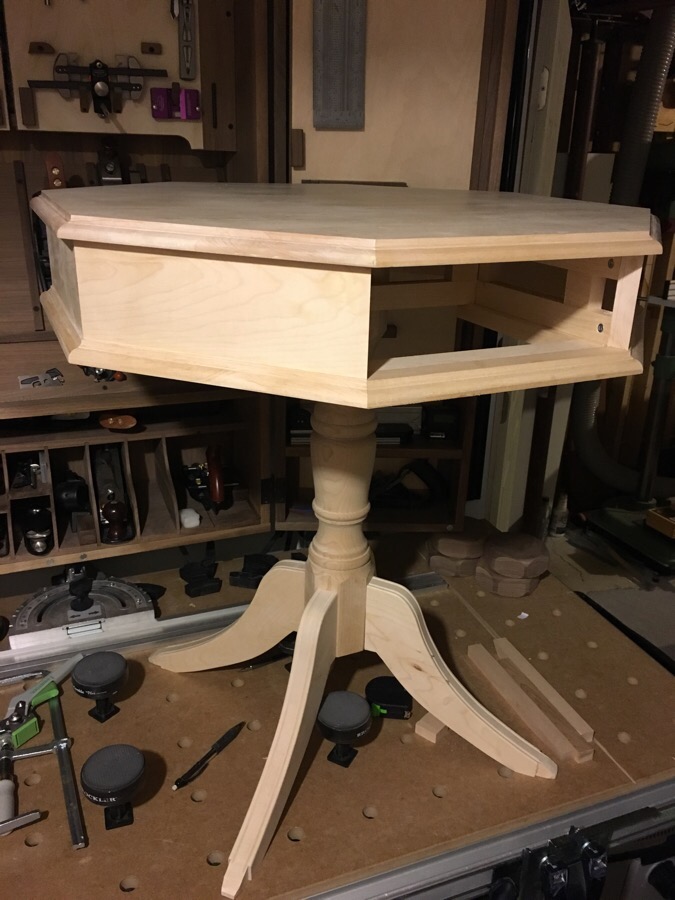
Then I had to build the drawer frame.
Next the hand cut dovetail drawer.
I laid out my 7 degree tails.
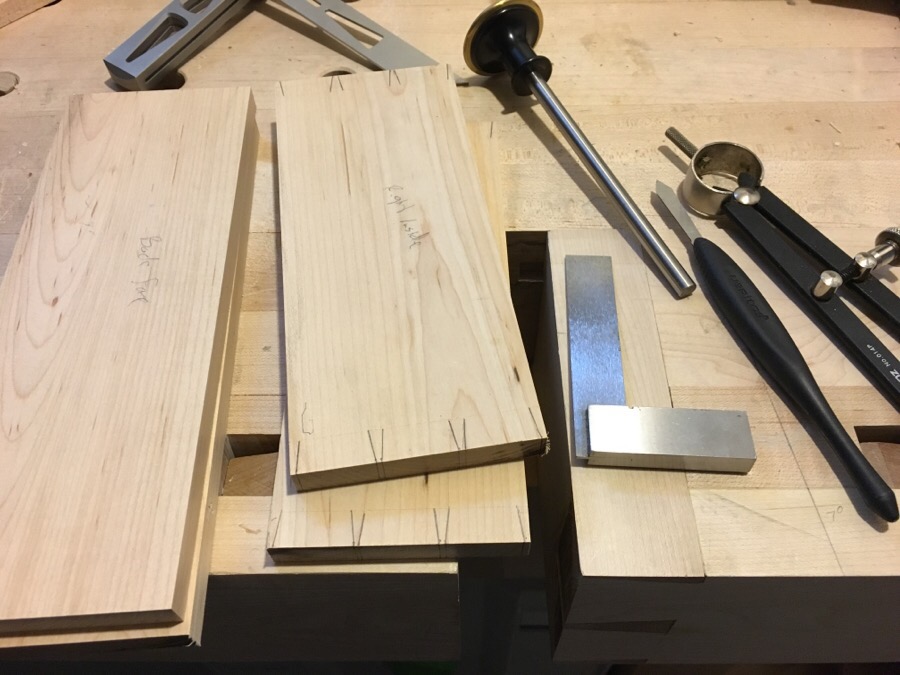
Then sawed to the scribe depth line.
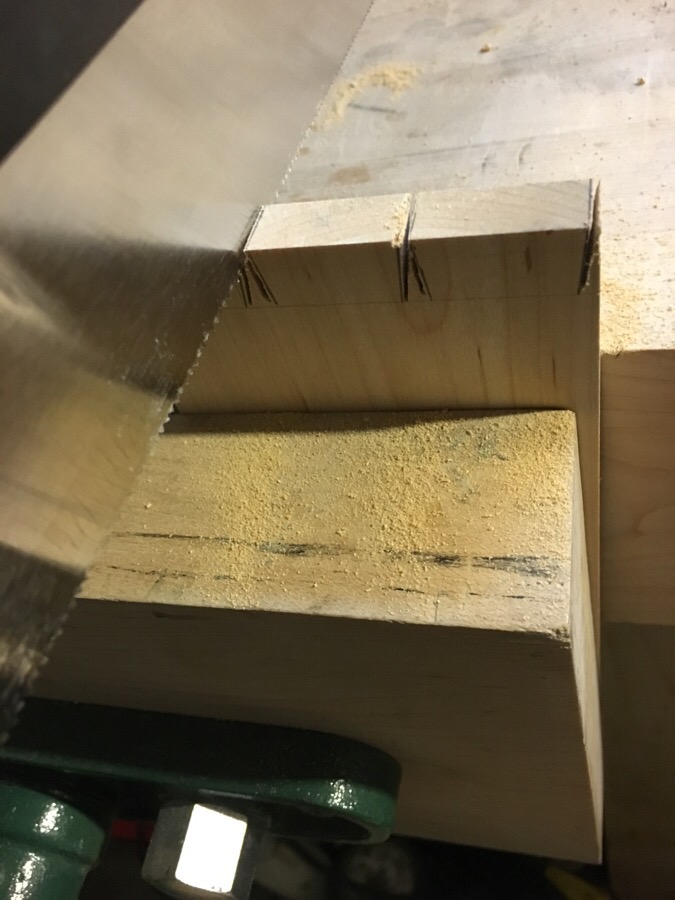
Then sawed out the waste.

The chiseled the rest to fit.
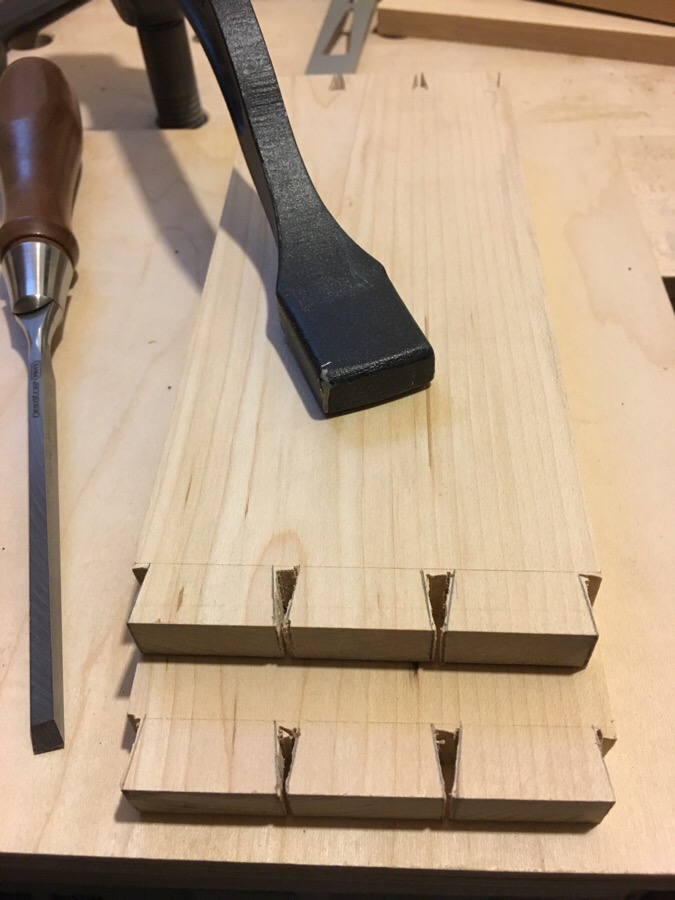
The pins went the same way.
To sculpt the decorative profile on the top of the legs a router bit wouldn’t do so I tried using scratch stock to form the two outside beads. It works pretty good, better than I thought especially on hard maple. It’s literally a rounded shape filed on the edge of a piece of metal then clamped in place and scratched or pushed/dragged along to wood until you scrape away the wood.
When it bottoms out it stops cutting.